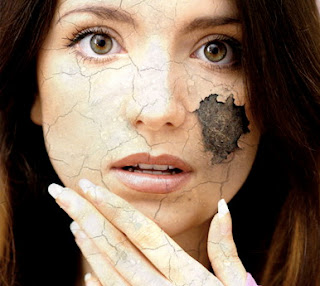
 Here is the new Photoshop Tutorial about how to make Crack and Peel Effect. I was asked how you get skin to look as if it was cracking or peeling off, so here are the basics, enjoy it. Oh, and please, keep in mind that I was pretty lazy at some points, so your result should be better than mine.
First, chose the picture you want to work with. Then go looking for a texture you like. This texture needs o have the "look" you want to give her face, in this case, I want the face to look cracked for a start, so I choose a texture with loads of crack in it. The texture needs to be as big or bigger than the part you want to cover with it. If the crack just mysteriously stops in the middle of her face (because you have reached the edge of the texture image), there certainly are ways to fix that, but why not just take a proper texture from the start?
Next, put the texture above the face (just drag and drop the texture from one image to the other) and se the texture-layer's blend mode to Multiply. To see the complete tutorial about how to make a crack and peel image, you can visit Deviantart or DOWNLOAD full tutorial.
Labels: Crack and Peel Effect
0 Comments:
Subscribe to:
Post Comments (Atom)
